
This content may include affiliate links, which means if you click on them, I may get a commission. The cool thing is, there’s no extra cost to you!
How to cover a lampshade (temporarily) #MadforPlaid
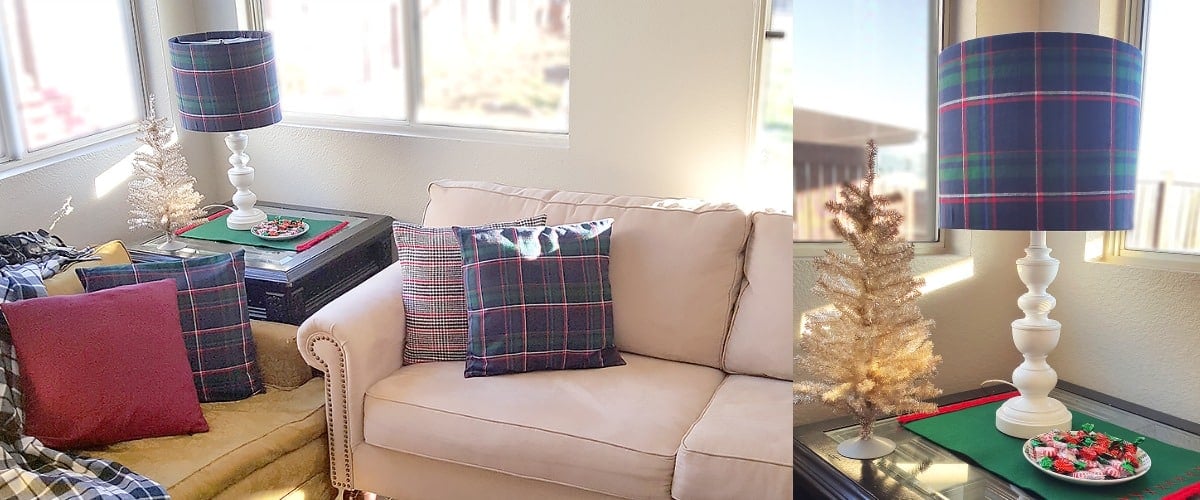
Plaid is totally on trend right now and perfect for the holidays. And plaid is great for kids' room as they get older. As we did our last yeard sale of the year last weekend, I saw that Katie was getting rid of a zenbra print lampshade I bought for her room. When she was nine years old. So obviously, at almost 17 years old, she was not wanting that lampshade in her room anymore. But I saw it had potential – a great shape, no damage, it fit a pretty lam base we had … so I decided to share with you how to cover a lampshade with plaid fabric for the holidays. This post contains affiliate links.
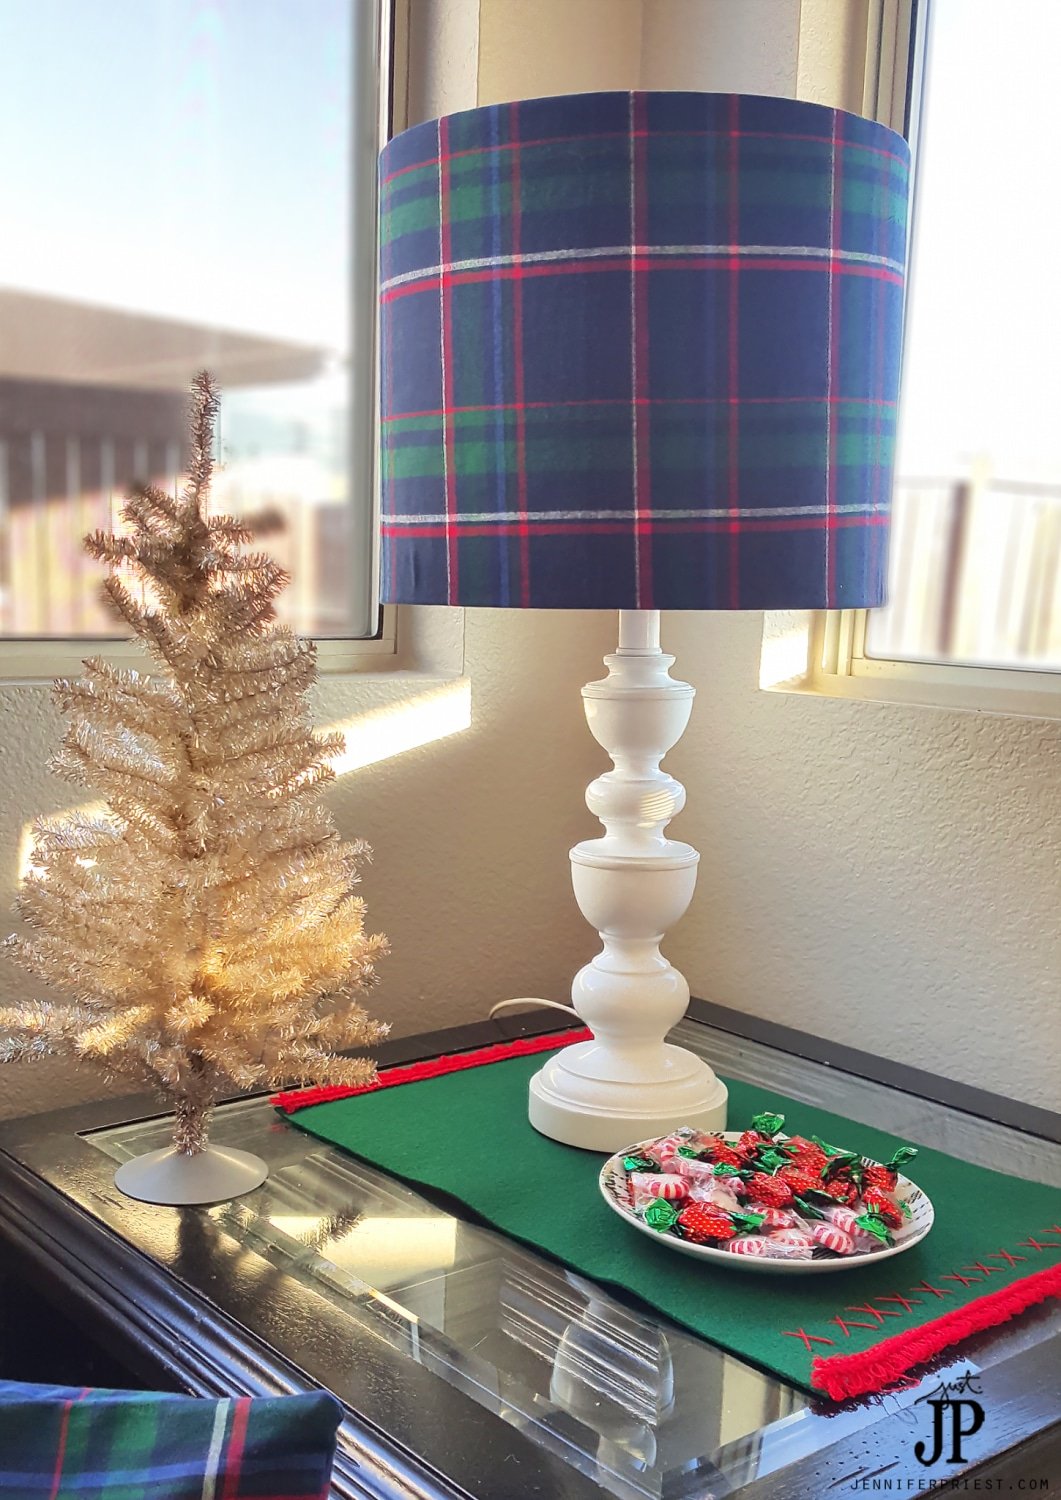
You might remember last week when I shared a set of plaid pillow covers I made for my living room, transforming the space into a holiday-ready cozy family room for under $50. I had some leftover plaid fabric from that project that was perfect covering this lampshade.

Since I know plaid is a fad right now and I plan on removing this pillow covers after the holidays are over, I knew I wanted a temporary way to cover the lampshade with the fabric. I decided to use Aleene's Repositionable Tacky Spray Adhesive to add the fabric to the lampshade. I've used this adhesive for holding stencils in place while I paint and creating a tacky surface of foam to hold fabric in place for upholstery projects (we've got a recovered bench project coming soon!). Why not for a lampshade? The adhesive is repositionable so you can make sure you get the fabric in just the right place before really sticking it down. The adhesive will hold while the fabric is in place but when I peel away the fabric, the lampshade will not be tacky. Okay, it will have tacky zebra print on it still but it won't be STICKY.

Got an ugly lampshade? Cover it with fabric! The trick to this project was using a drum style lampshade that is not tapered at one end. Here's how:
You'll need some supplies for this project and I've got you covered. Some of these links are affiliate links to help you locate the right supplies for the job:


Thanks again for stopping by!
About the Author

Jennifer Priest is a 20+ year designer in the arts & crafts industry and home DIYer with a passion for creativity. An Army veteran raised on a ranch, from her experience, she shares smart DIY projects that save money and fun craft ideas that anyone can make. Besides blogging, Jennifer is a Master Practitioner and Trainer of NLP, Hypnosis, and MER, and coaches other online entrepreneurs on money mindset, business, and living an intentional life. When not blogging, Jennifer is having adventures in the wilderness, on road trips, playing with her cats, and making paleo food.


Yay! No more ratty lampshades. Love your Christmas decor.
I love the way this turned out! The pillows are cute too… I’ll have to go check them out.